Let’s Get Started
We shall be using PostgreSQL - a widely used relational database. It’s open-source and free to use. If you haven’t already installed it then follow the instructions below:
⚠️Windows
Windows is not supported at CYF. You are not allowed to use Windows.
If you get stuck post a message asking for help on your class channel.
Ubuntu setup
Learning Objectives
Install
If you have Ubuntu as your operating system you can install PostgreSQL using the following commands in the terminal (note: the $ is the system prompt):
sudo apt-get install postgresql postgresql-contrib
Enter your ubuntu password when asked for it (it’s needed for the sudo command).
For this command you must confirm that you are happy to install the packages and any needed dependencies that the package manager identifies. Generally just type Y or y to proceed.
To verify your installation enter the following commands:
sudo -u postgres psql --version
Again, enter your Ubuntu user password when prompted. The command should display something like this:
psql (PostgreSQL) 12.2 (Ubuntu 12.2.4)
Create Your User and Database
Create the database user with the same name as your Ubuntu username (this makes logging in a bit easier):
sudo -u postgres createuser -P --createdb <username>
This will ask for your Ubuntu login password to run the sudo command. The other parts of the line are:
-u postgrestells sudo to run createuser as user postgres (set up when you installed postgres) -createuserthe shell command to create a PostgreSQL user-P(upper case) tells createuser to ask for the new user’s password--createdbgrants the user the privileges to create databases<username>the new username (hint: make it the same as your o/s username)
You’ll be asked for the new database user’s password (twice) - you’ll need this later for when we connect to the database from Node.
Remember the new username and password details - you will need them later.
Creating a new database
In a terminal, create a new database named my_hotels with the following command:
createdb my_hotels
Then connect to your database with:
psql my_hotels
Note that if you chose to use your Ubuntu username for the database you don’t need it (or the password) to log in to psql. If you used a different username then you’ll need to log in with:
psql -U <username> my_hotels
and you’ll be prompted for the password.
The output from this command should look something like this:
psql (12.2 (Ubuntu 12.2.4))
Type "help" for help.

my_hotels=>
The last line (my_hotels=>) is the psql command prompt, made up of your database name plus ‘=>’.
Note that to exit psql back to the terminal prompt use the command \q.
Mac-OS setup
Learning Objectives
With the Apple Mac you can choose either a graphical installation or a command line method. The graphical method mostly involves dragging and dropping icons with a little bit of command line to configure the tools we need. The command line method uses only command line but is fairly simple.
Graphical Installation
Note that you must be logged in as a user with Administrator privileges on OSX for all these steps.
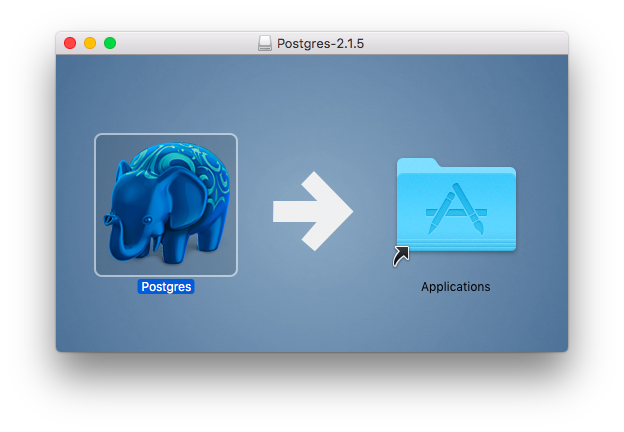
From the Macintosh OSX system you can install PostgreSQL from the Postgres.app package. Download this from https://postgresapp.com but make sure you choose PostgreSQL version 12 and the appropriate platform for your Mac. Once you have downloaded Postgres you can open the disk image from your Downloads folder. Drag the Postgres icon to the Applications folder.

Open Applications in the Finder and start Postgres. When you receive the alert “Postgres” is an application downloaded from the internet… then click on the Open button. You may be prompted for other options (e.g. auto update, …) and you can choose your own preference.
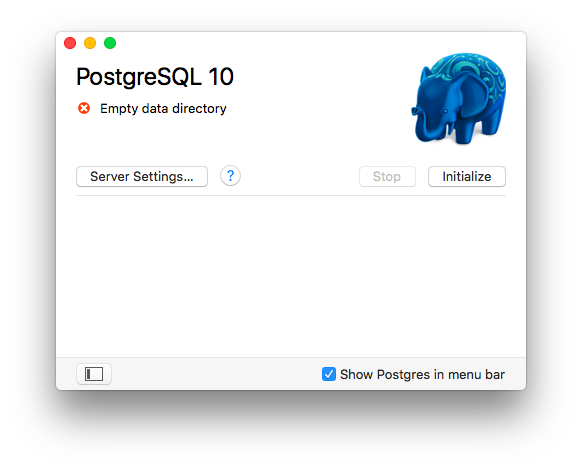
When the PostgreSQL window appears then click on the Initialise button to create your local PostgreSQL database and user - they will both have the same name as your OSX username.

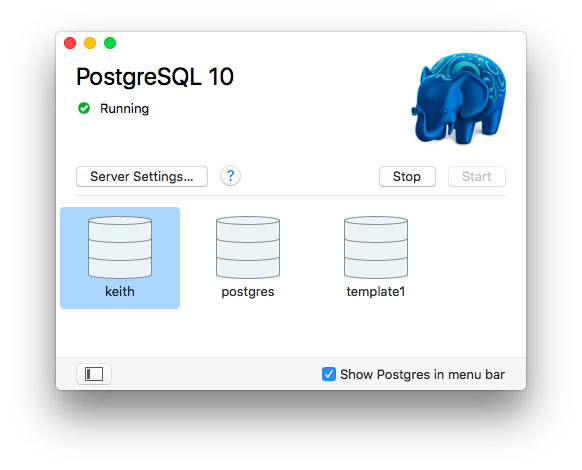
PostgreSQL initialises itself, creating the initial databases (template1, postgres and <your user name>) along with corresponding users. These should then be displayed in the PostgreSQL window, as below:

Configure the Command Line Interface (CLI)
To use the PostgreSQL command line tools you need to add the directory to your path (used to find commands in the terminal). There are several ways to do this but the simplest is to create a file containing the directory path name. Open the terminal and enter the appropriate commands from the list below (note: you may not need to create the directory):
# First check the destination directory exists:
ls /etc/paths.d/
# If the directory doesn't exist then create it:
sudo mkdir /etc/paths.d
# Create the path entry for Postgres:
echo /Applications/Postgres.app/Contents/Versions/latest/bin | sudo tee /etc/paths.d/postgresapp
From the terminal you can now type the simple command:
psql
and this should produce something like the following:
psql (12.4)
Type "help" for help.

keith=#
The final line is the psql command prompt, waiting for you to enter a command. It comprises your database name (created with the same name as your username, in the example this is ‘keith’) followed by ‘=#’.
You are going to rename the database to my_hotels for the purposes of this course, so from the psql prompt (as above) first disconnect from your database by connecting to database postgres:
keith=# \connect postgres
Now, still at the psql prompt, rename the database:
keith=# alter database keith rename to my_hotels;
Clearly, you’ll use your own name as the name of the database to be renamed.
Note that to exit psql back to the terminal prompt use the command \q.
MacOS Graphical Install Complete
MacOS Command Line Installation
You need Homebrew installed on your Mac to use this approach. If you don’t yet have it then you should probably use the graphical method. If you already have Homebrew installed then the following command installs PostgreSQL:
brew install postgresql
This will install the software, set up the postgres user and a user with the same name as your Mac OS user and create some databases. It should leave the PostgreSQL server running on your Mac but if you power off the machine you’ll need to restart it. To restart the server, type:
brew services start postgresql
This starts the server and ensures that it will be started each time you power up your Mac. Note you can stop the server at any time by using:
brew services stop postgresql